glm-5.2 and DeepSeek-V4-Flash, and pricing, see the model catalog.
Configure
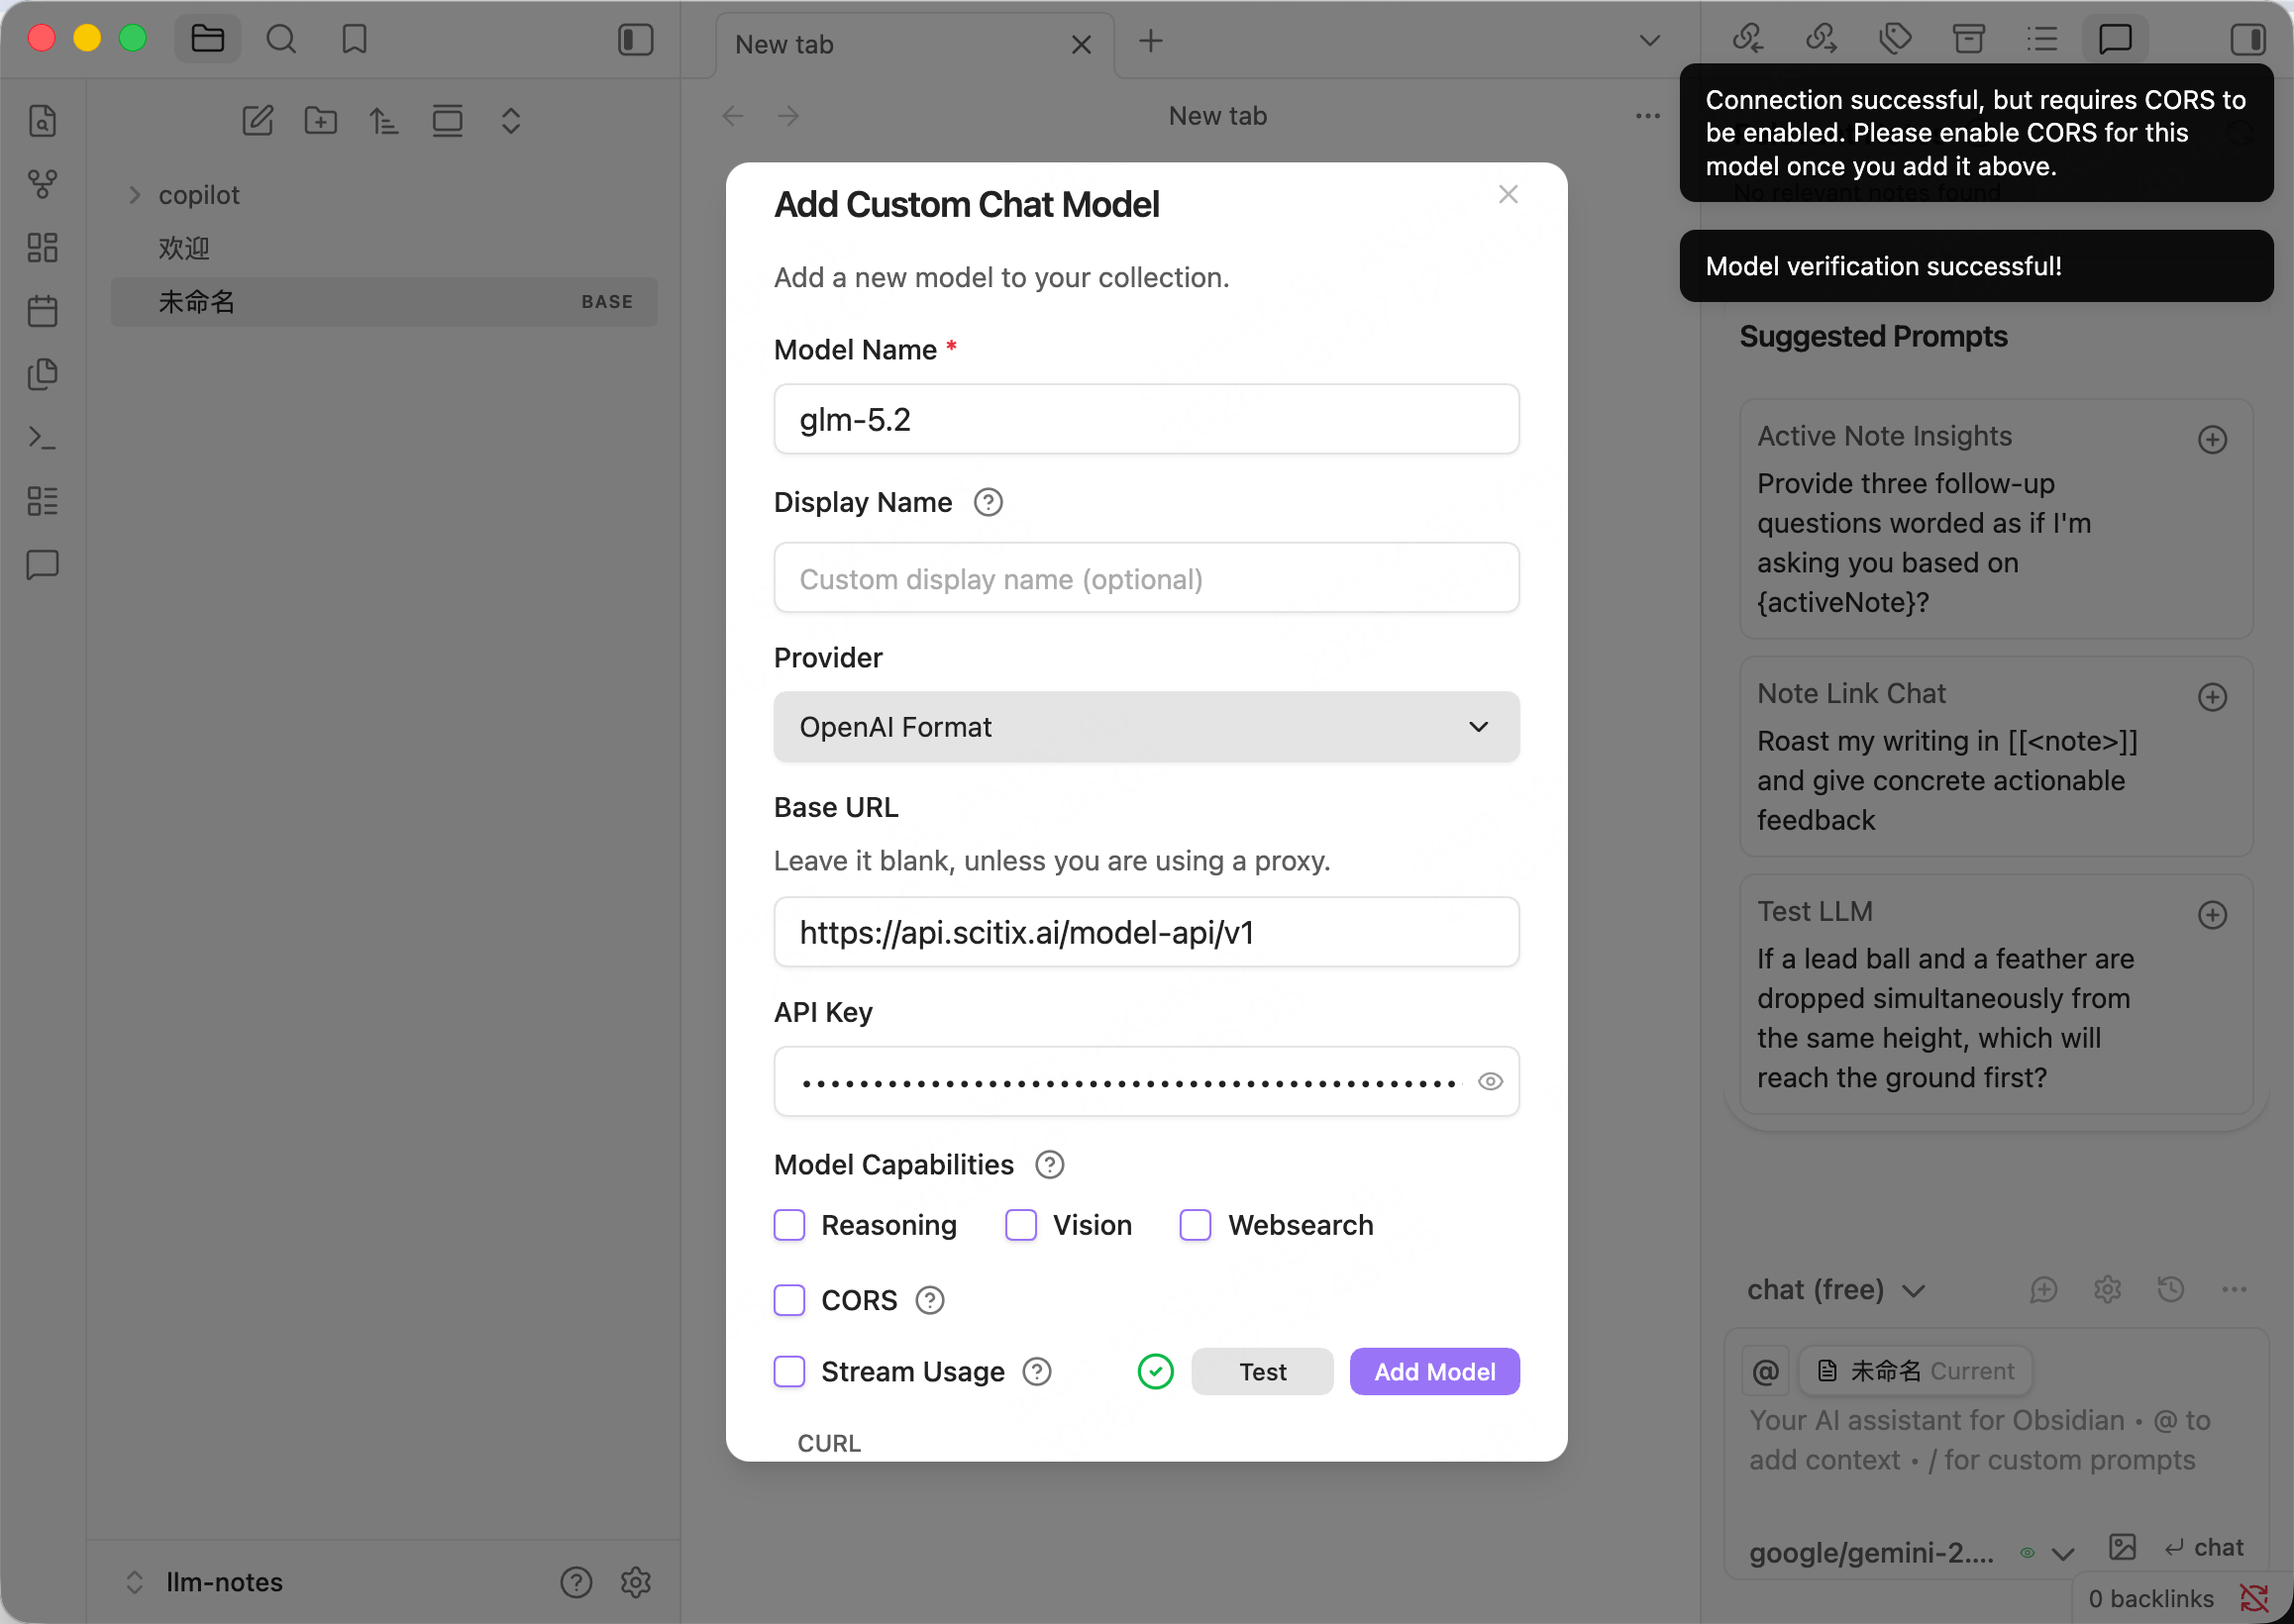
Create an API Key on the API Keys page first.- Open Settings → Copilot → Model, then click to add a model. The Add Custom Chat Model dialog opens.
-
Fill in the required fields.
Keep the following in mind:
- Provider must be OpenAI Format. This is the option for a custom OpenAI-compatible endpoint. The named providers, such as OpenAI or Anthropic, target their official services.
- The Base URL field is hinted as “leave it blank unless you are using a proxy”, but for a custom endpoint like ScitiX you must fill it with
https://api.scitix.ai/model-api/v1. - Choose a model with native tool calling if you use Copilot features that rely on it.
- Tick the CORS checkbox under Model Capabilities. The desktop app requires CORS for a custom endpoint. Otherwise, the Test button reports “Connection successful, but requires CORS to be enabled”.
- Click Test to verify the connection. Expect “Model verification successful!”, then click Add Model.
Verify
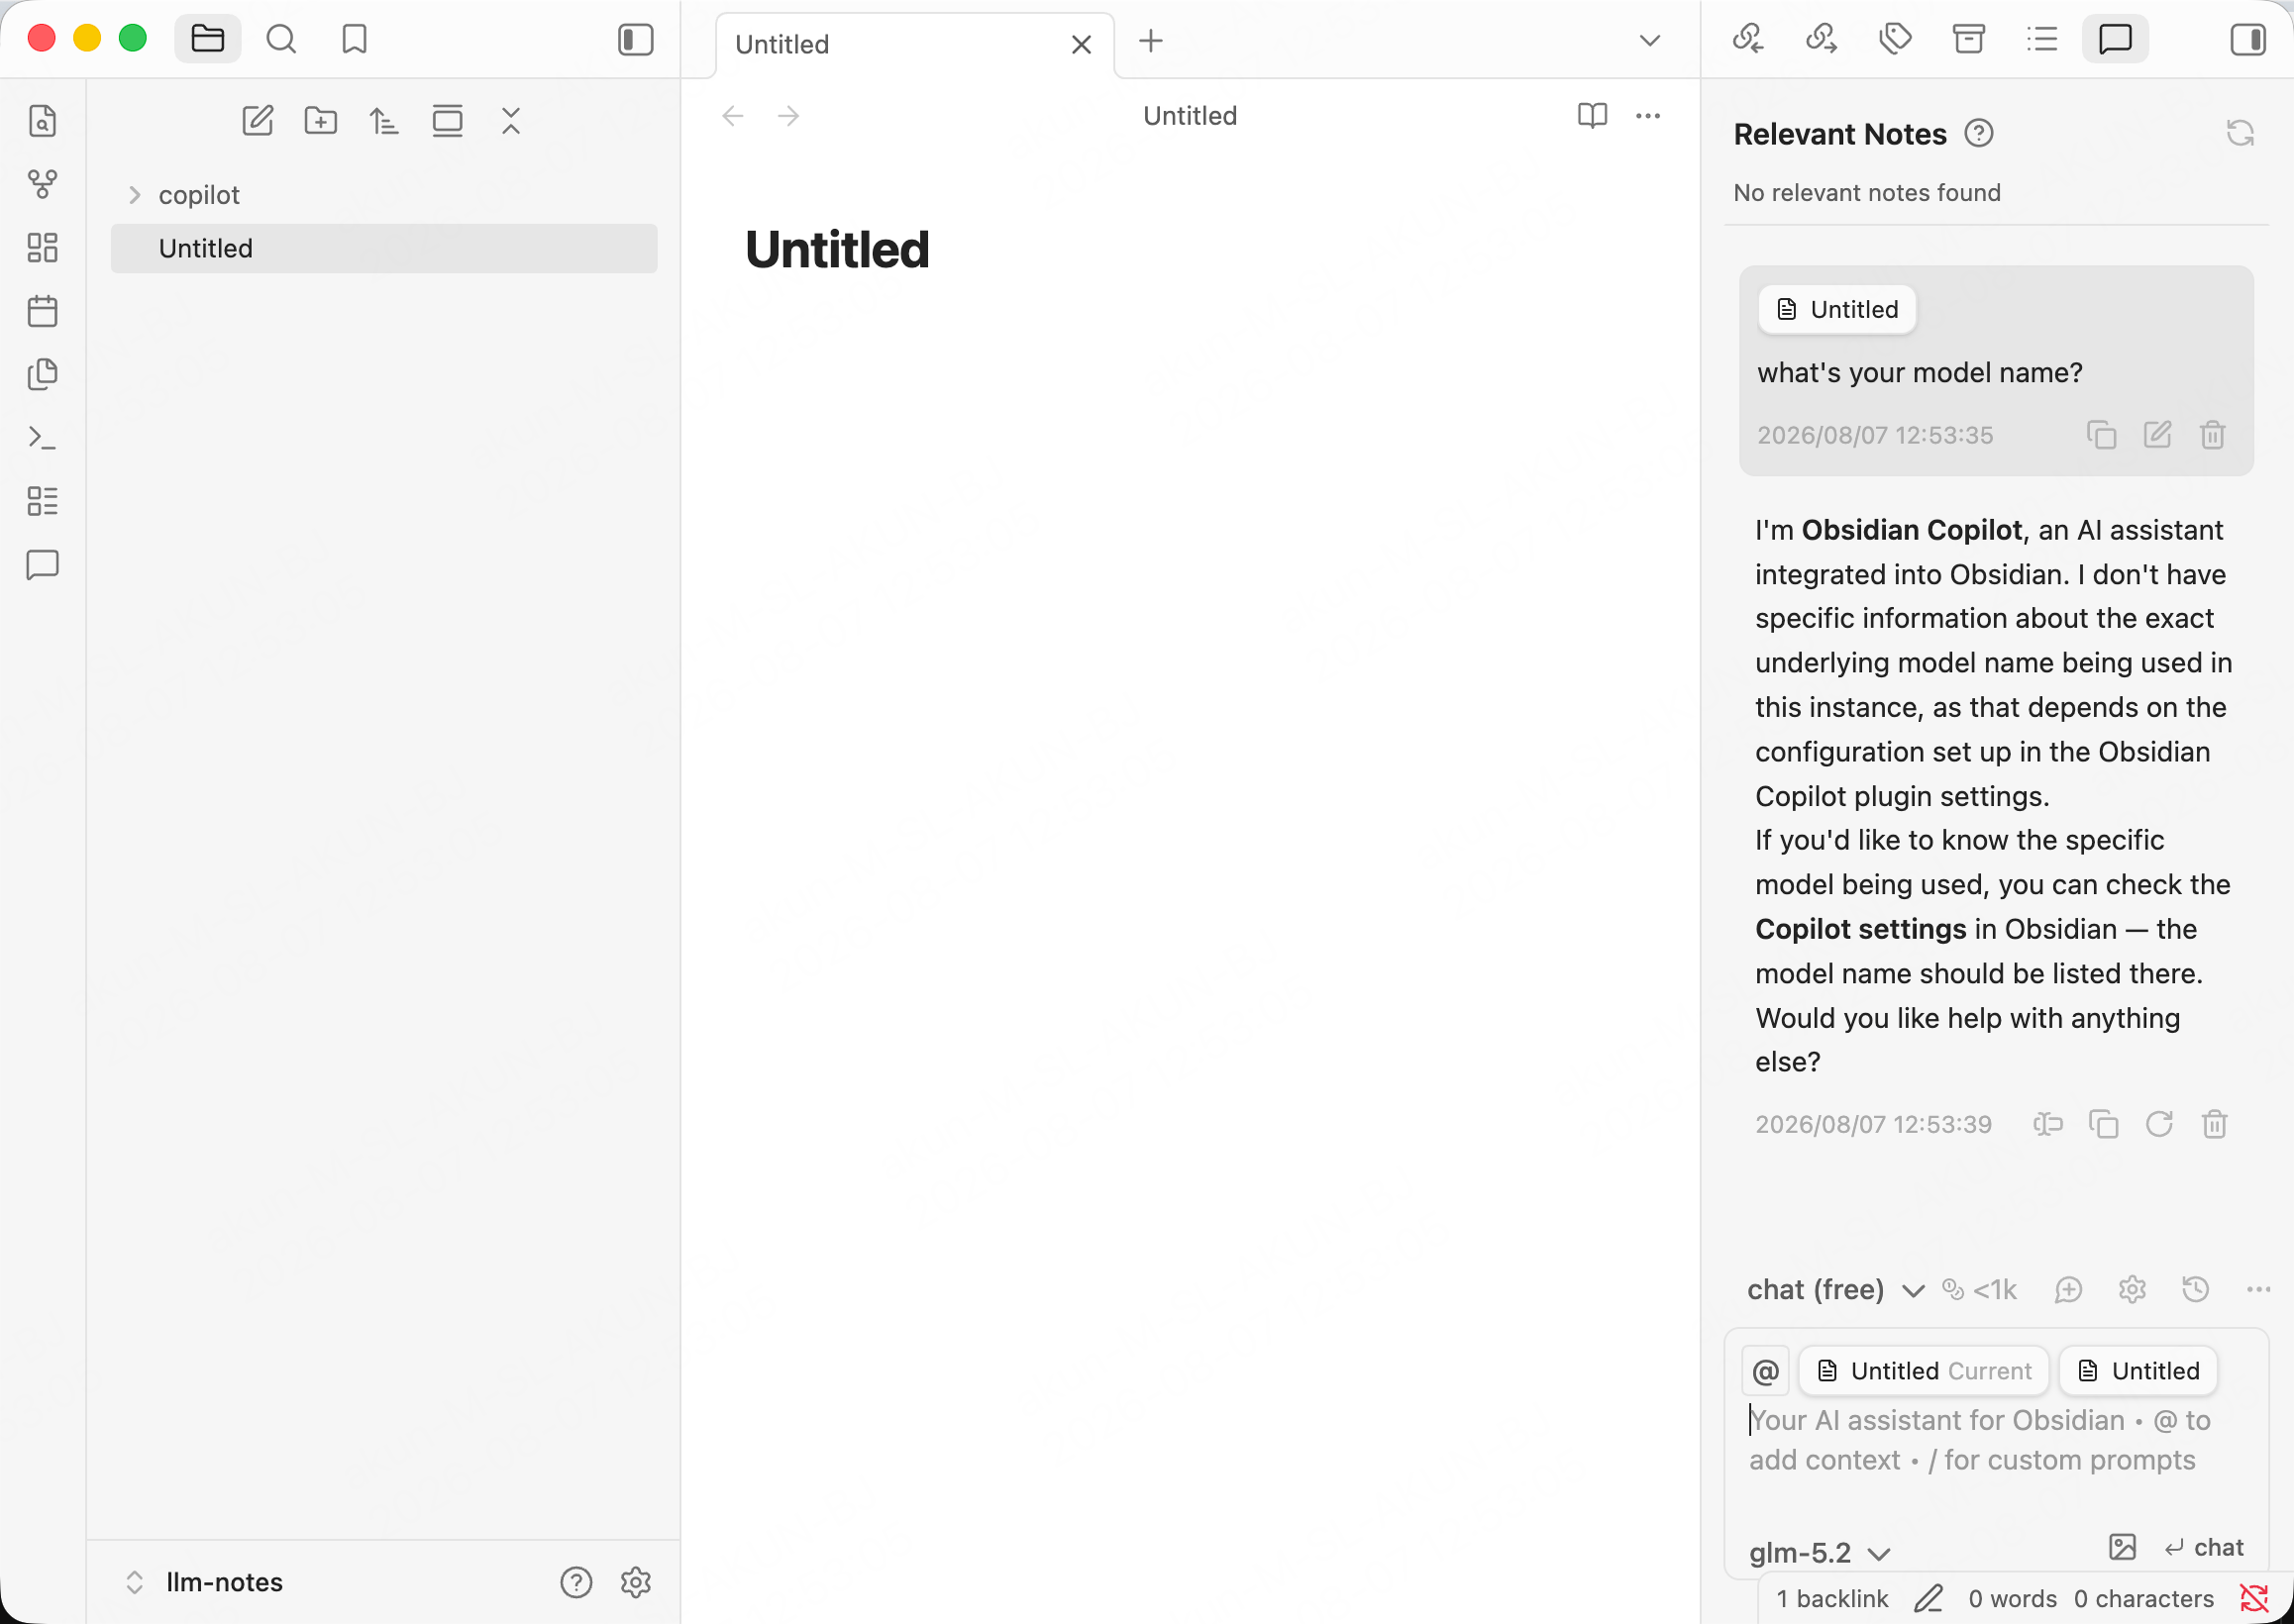
Open the Copilot chat pane, selectglm-5.2 from the model selector at the bottom, and send a message. A normal reply confirms that the connection works.
The assistant may identify itself as “Obsidian Copilot” rather than the underlying model. That is the plugin’s own system prompt, not a routing issue; the model selector still shows the ScitiX model in use.