

Prerequisites
Before creating a Kubernetes cluster, ensure the following prerequisites are met:- If you plan to use RDMA networking, ensure you select the appropriate availability zone: zone-a for IB RDMA, or zone-b for RoCE RDMA. Note that virtual machines do not support RDMA.
- If you plan to attach shared file storage to the cluster, ensure a filesystem has been created in advance.
Configuration
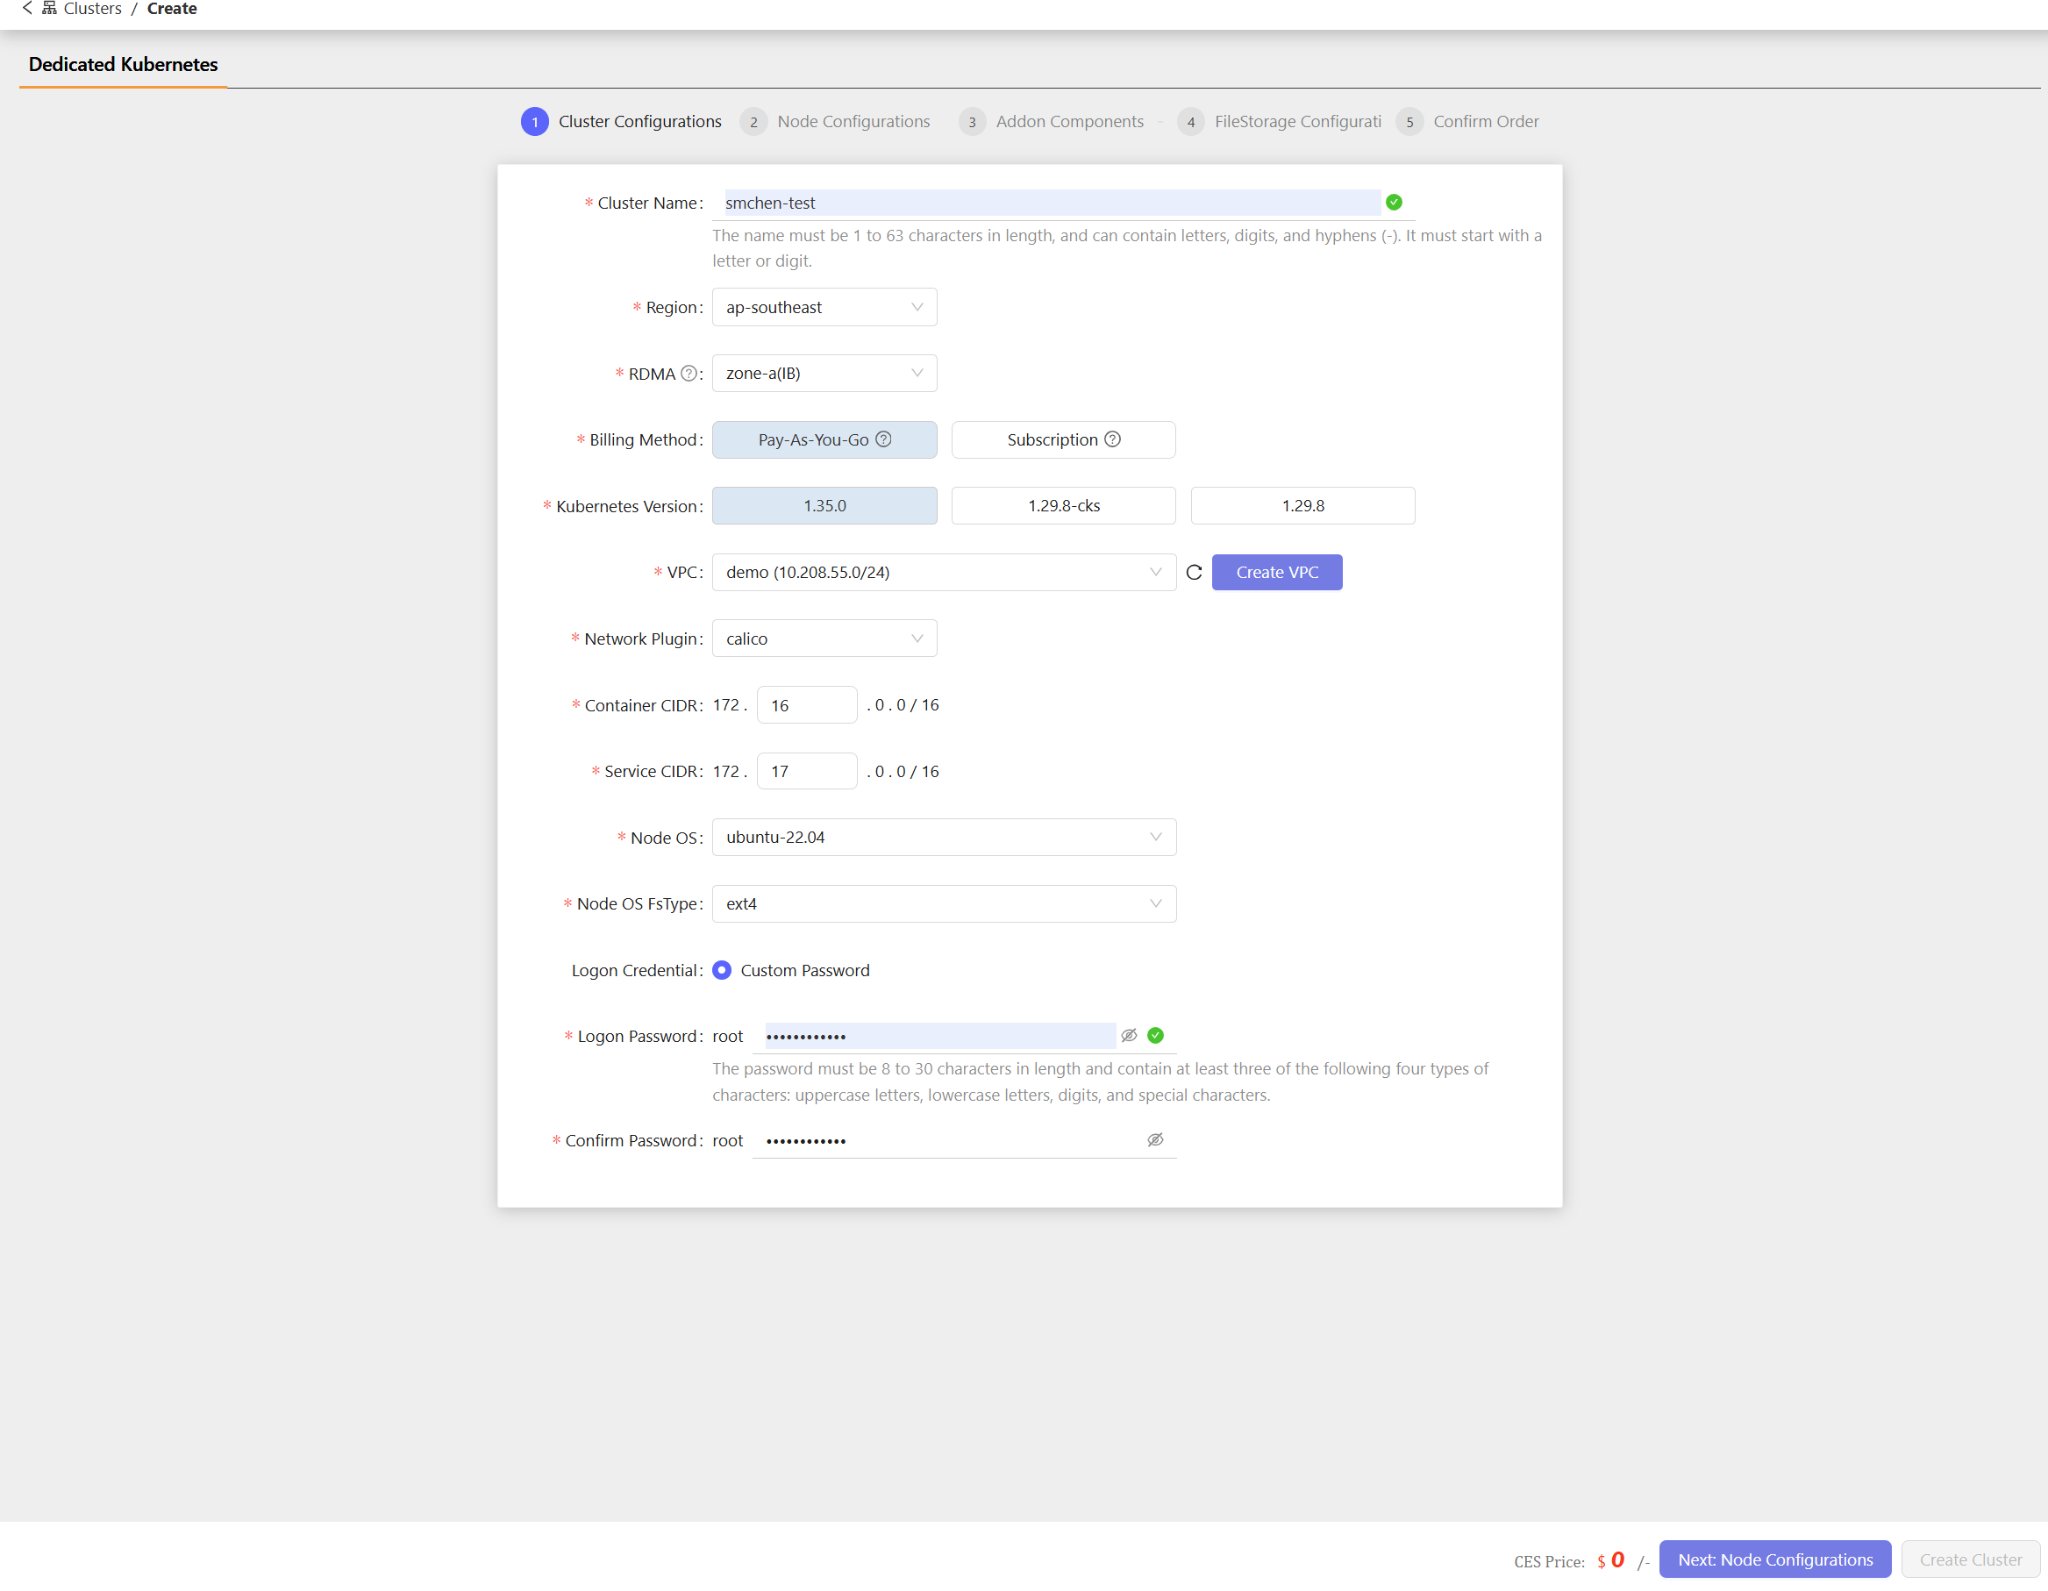
Step 1: Cluster Configurations
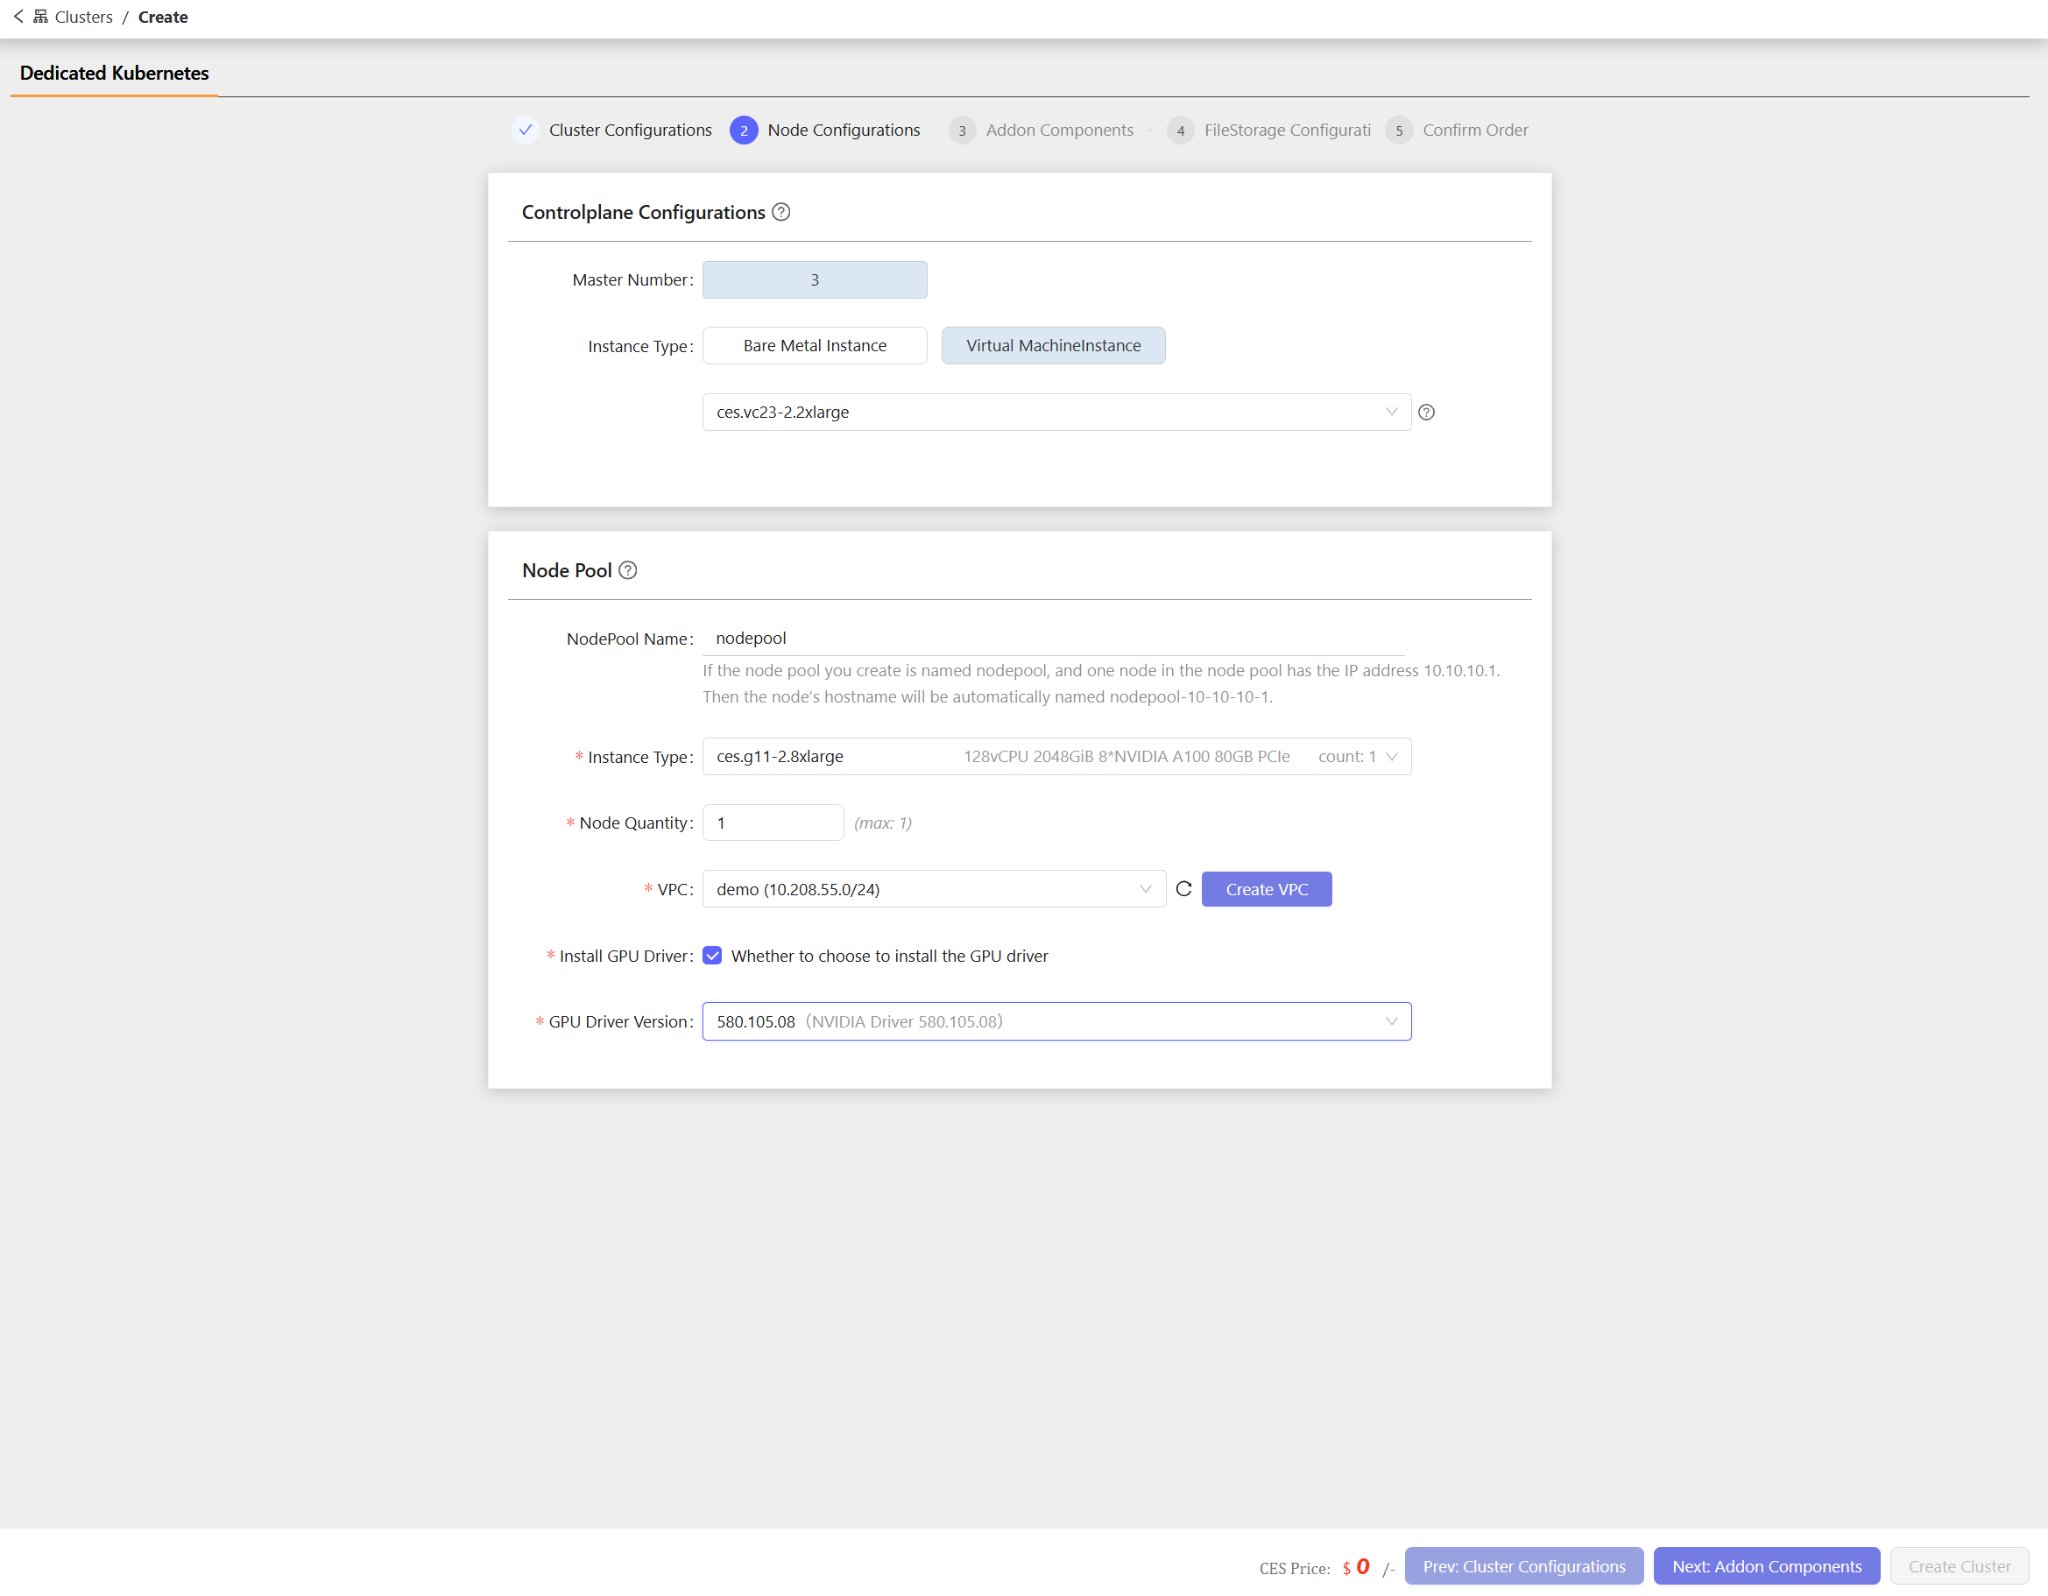
Step 2: Node Configurations
Controlplane Configurations
The production cluster uses bare-metal servers to build the control plane, while the test cluster uses virtual machines.Node Pool
A node pool allows you to create and manage a group of compute nodes with the same instance type, and quickly scale them out as needed.Instance types and performance
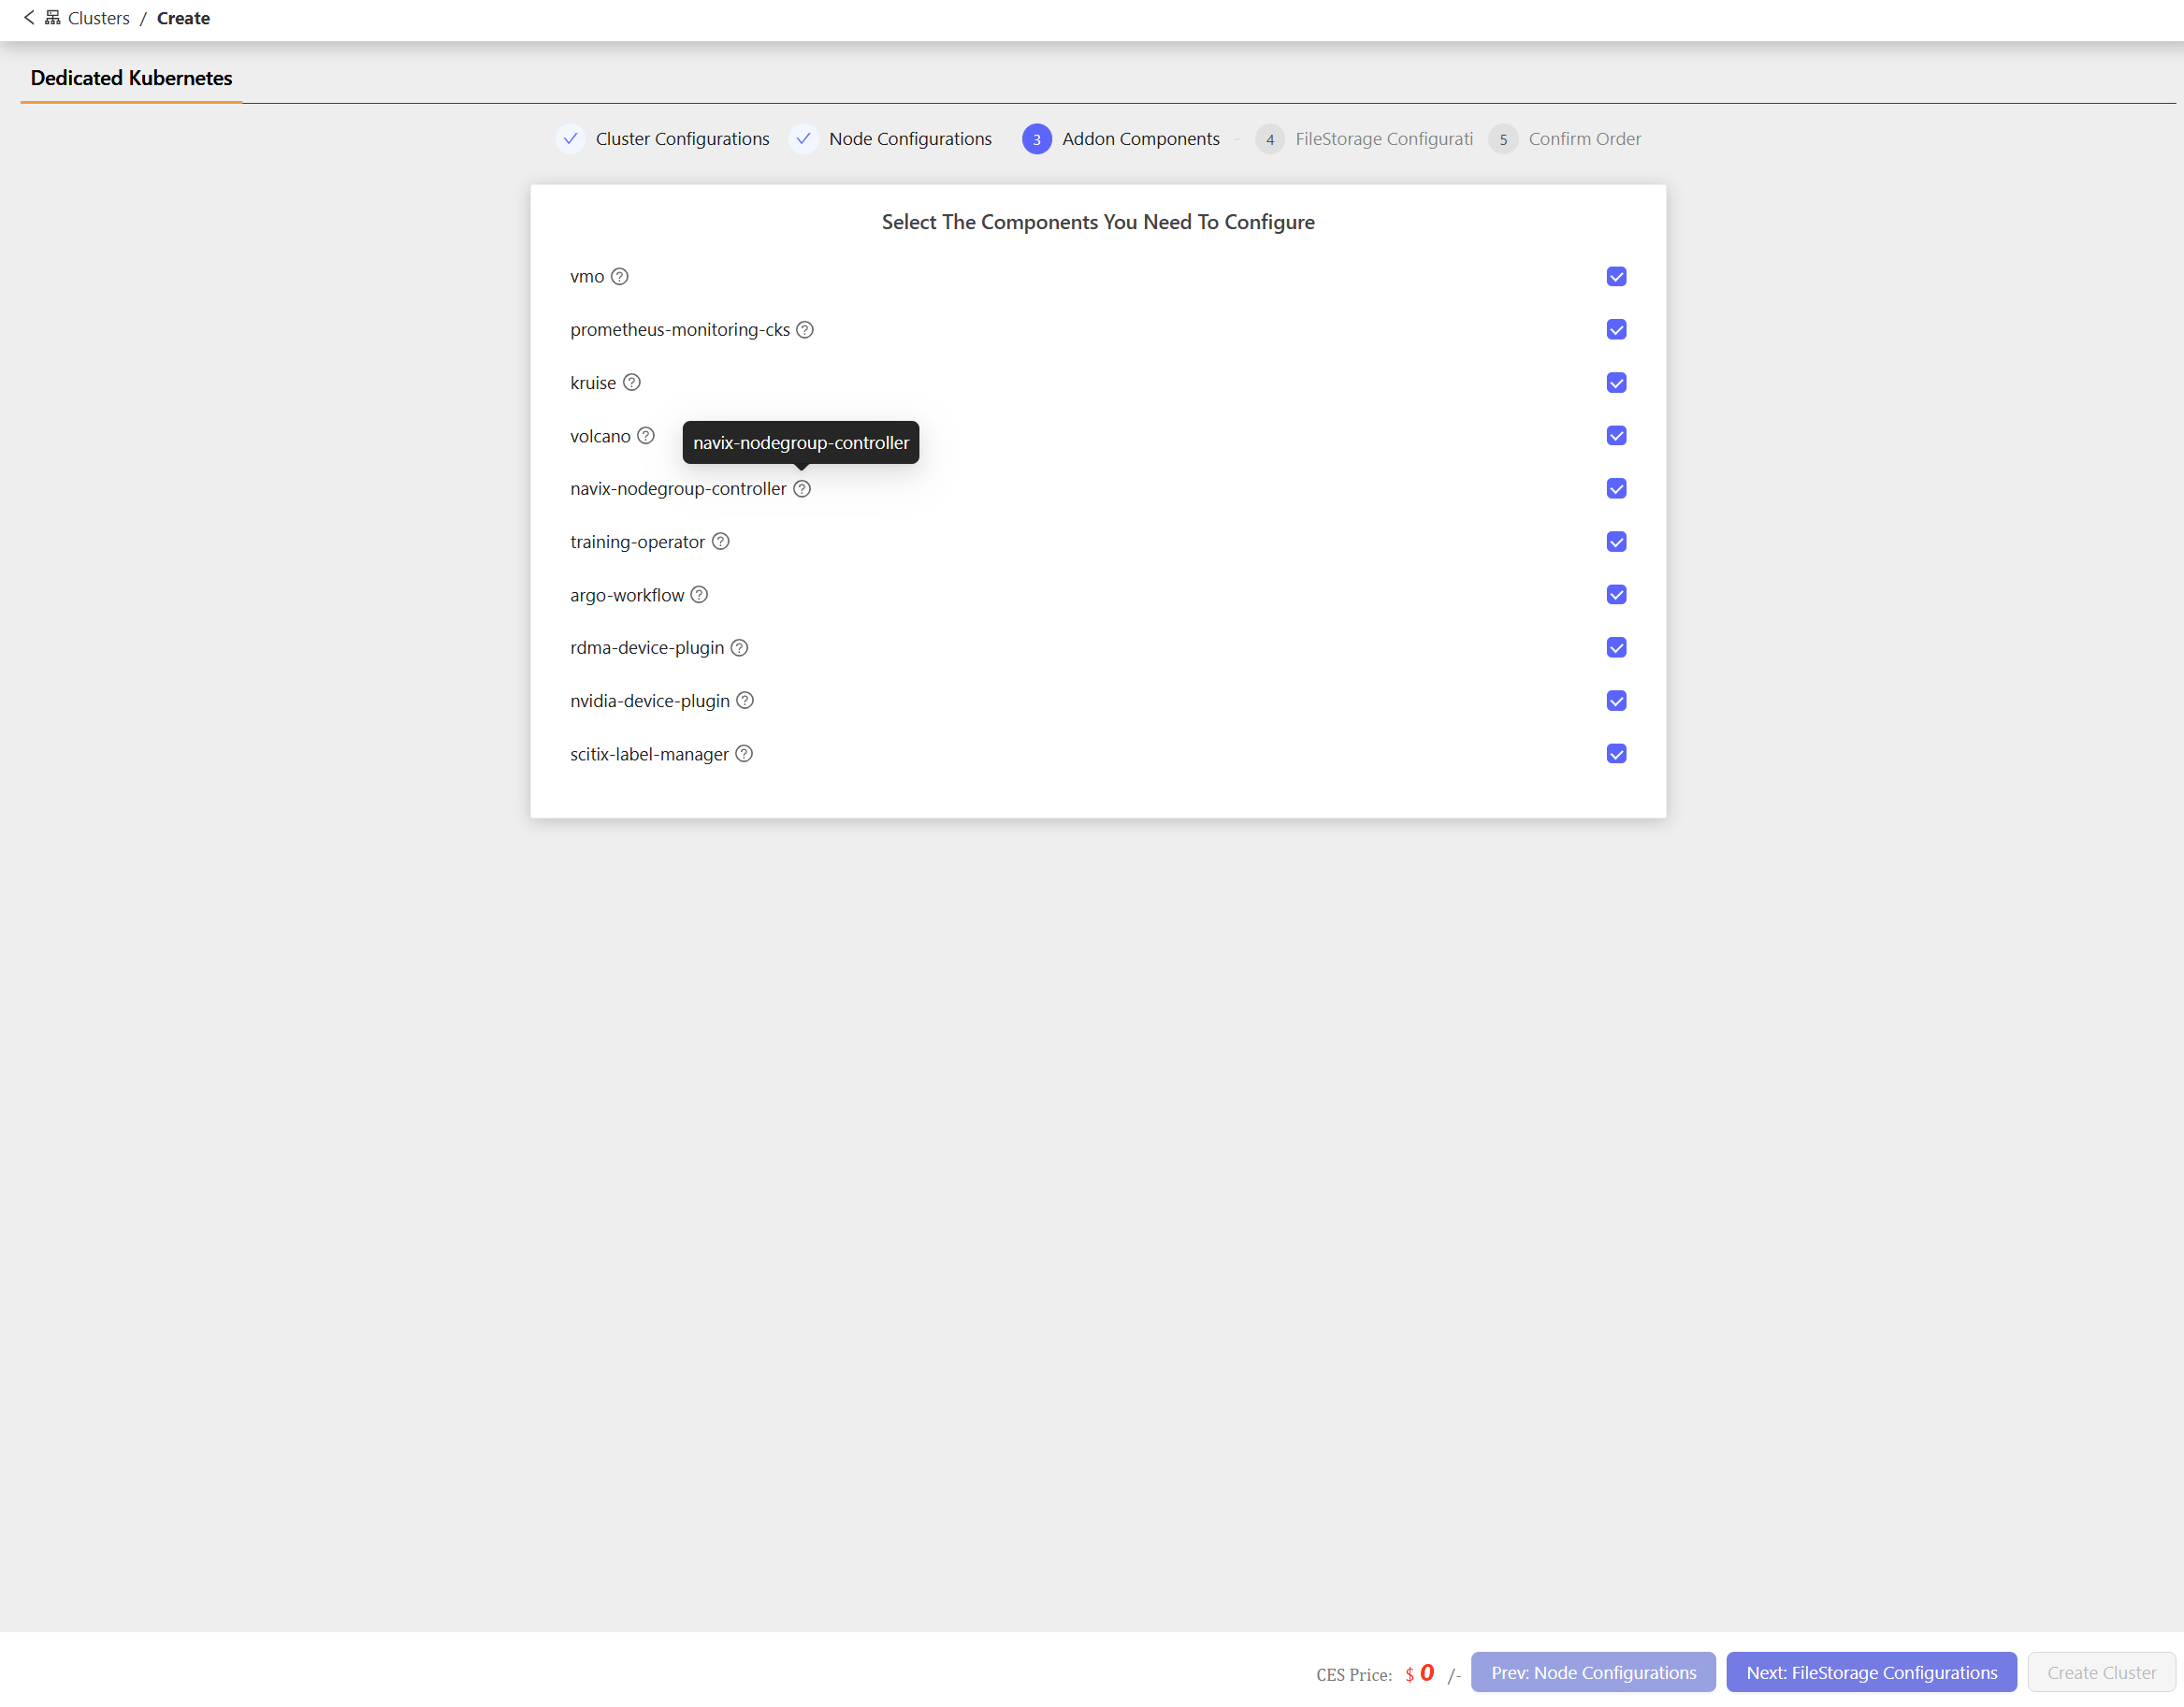
Step 3: Addon Components
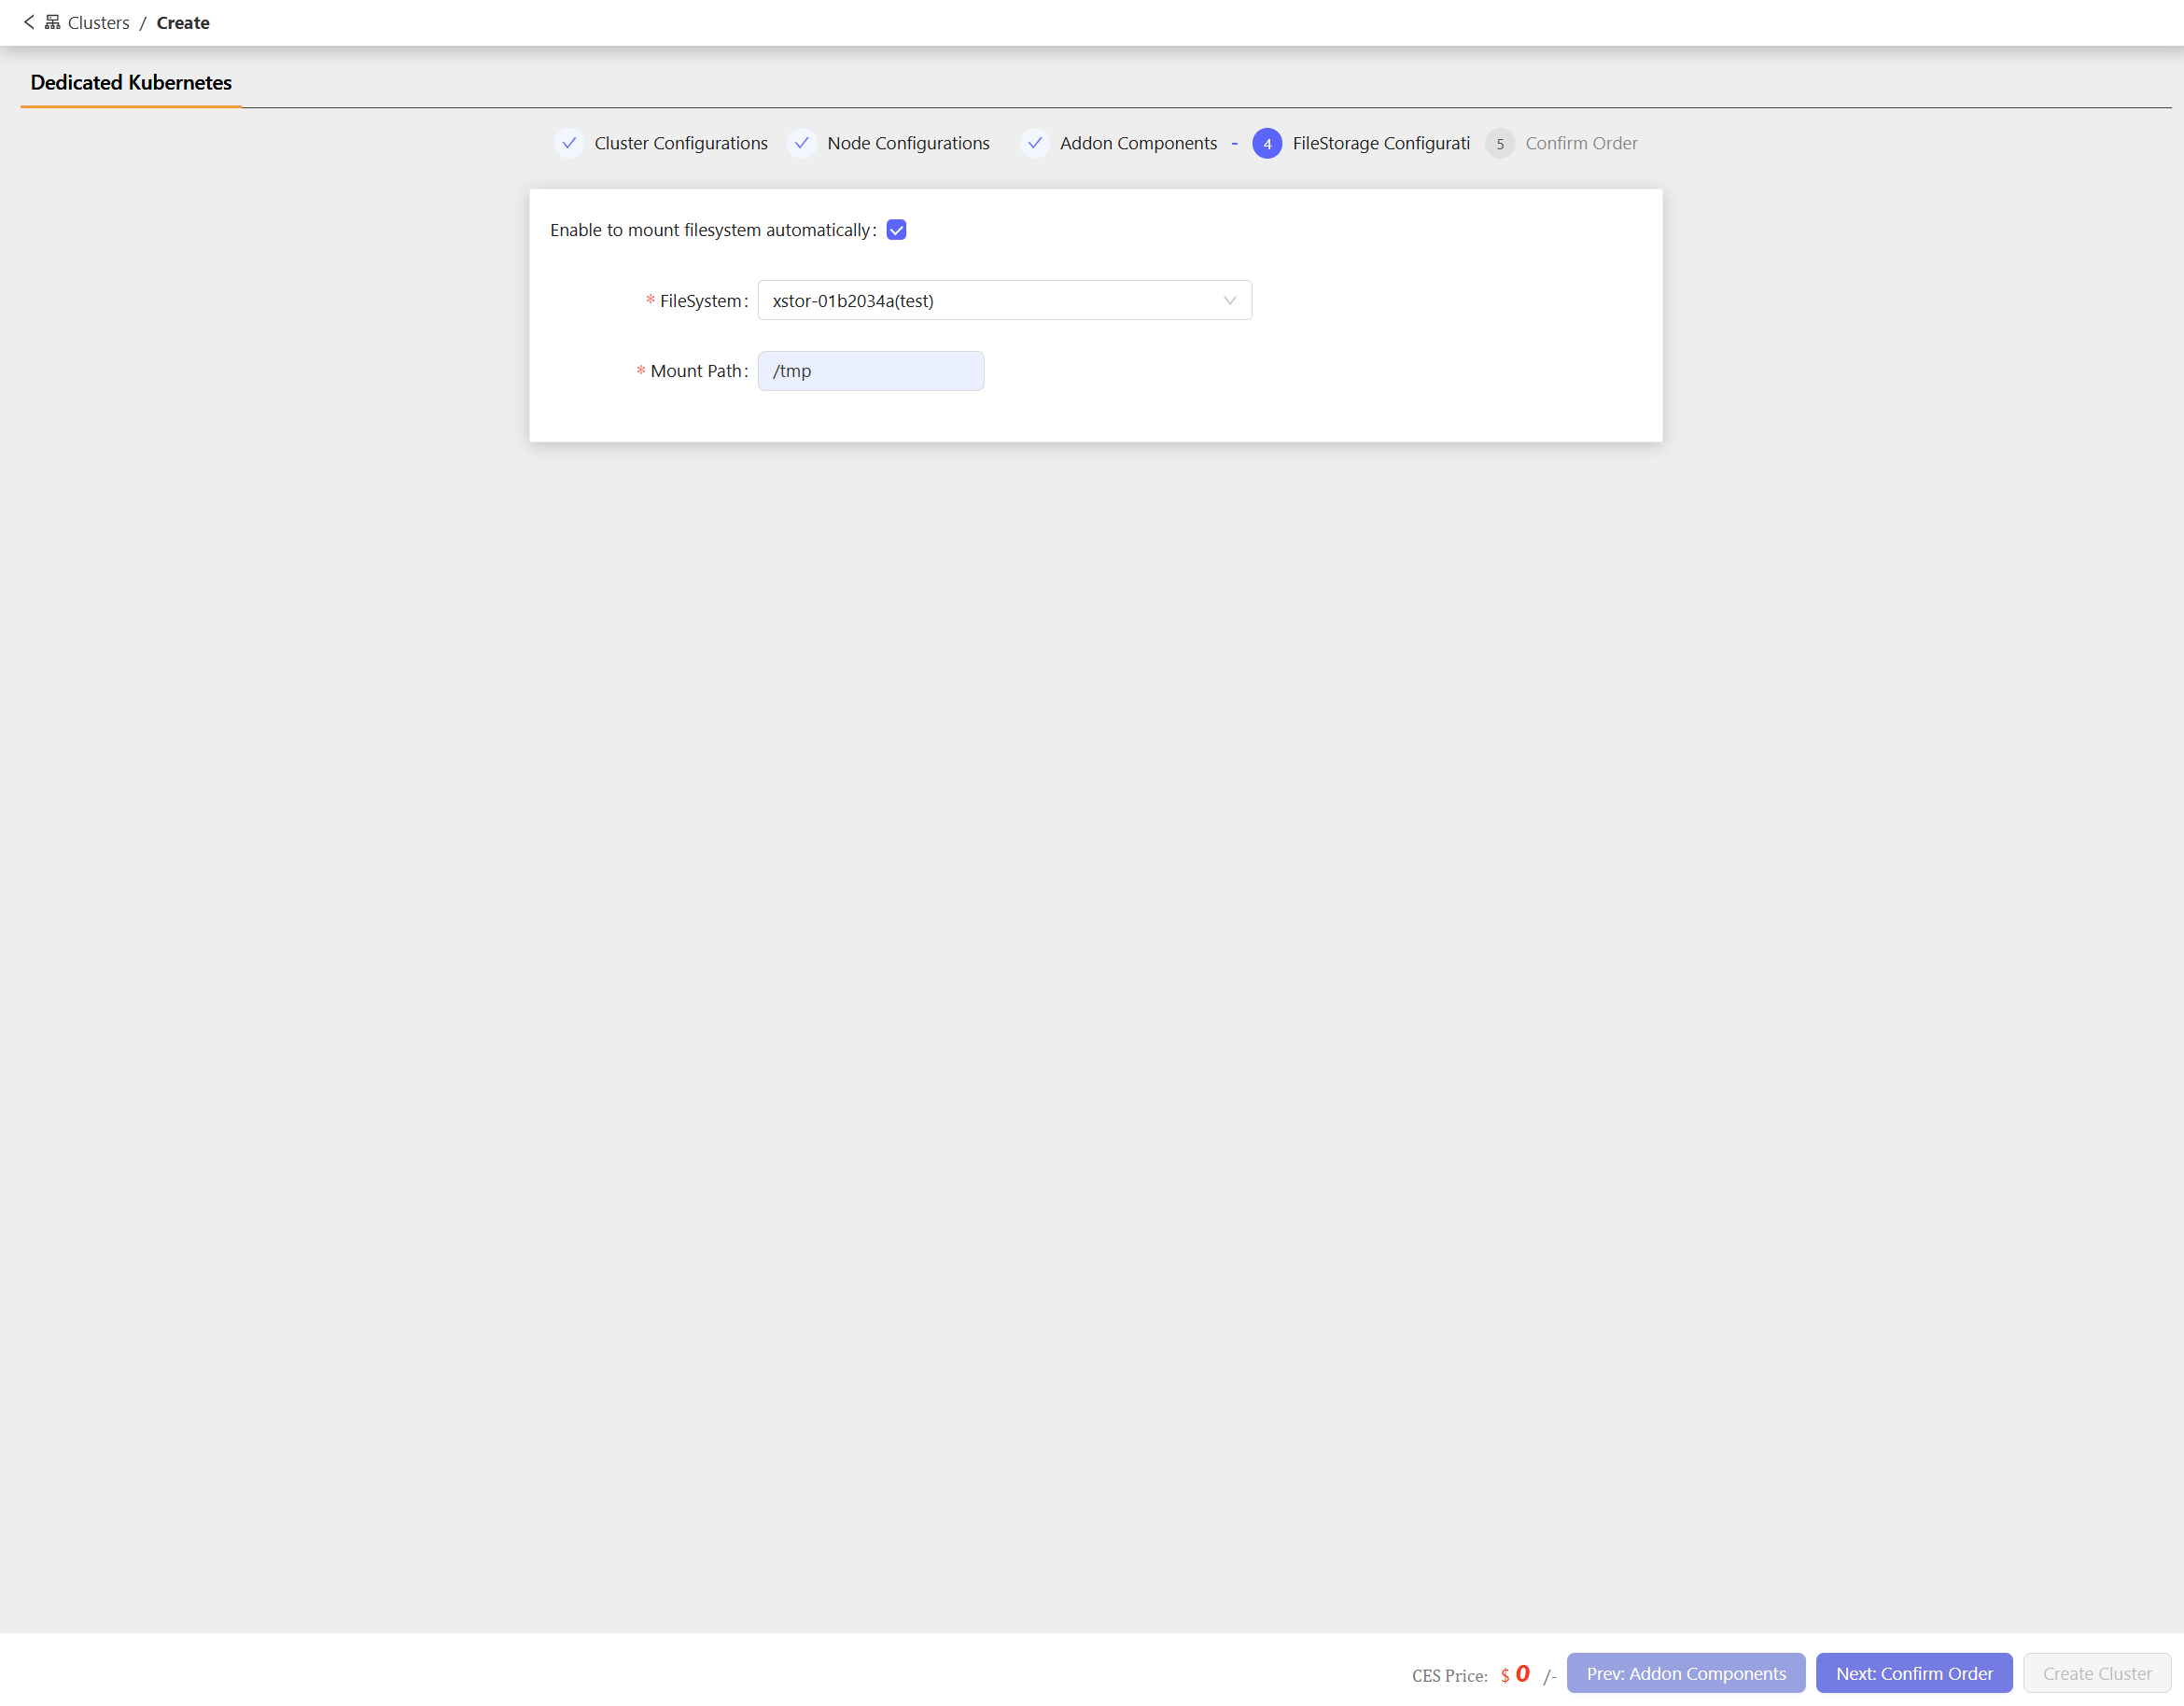
Select the optional add-on components to deploy alongside the cluster.Step 4: FileStorage Configurations
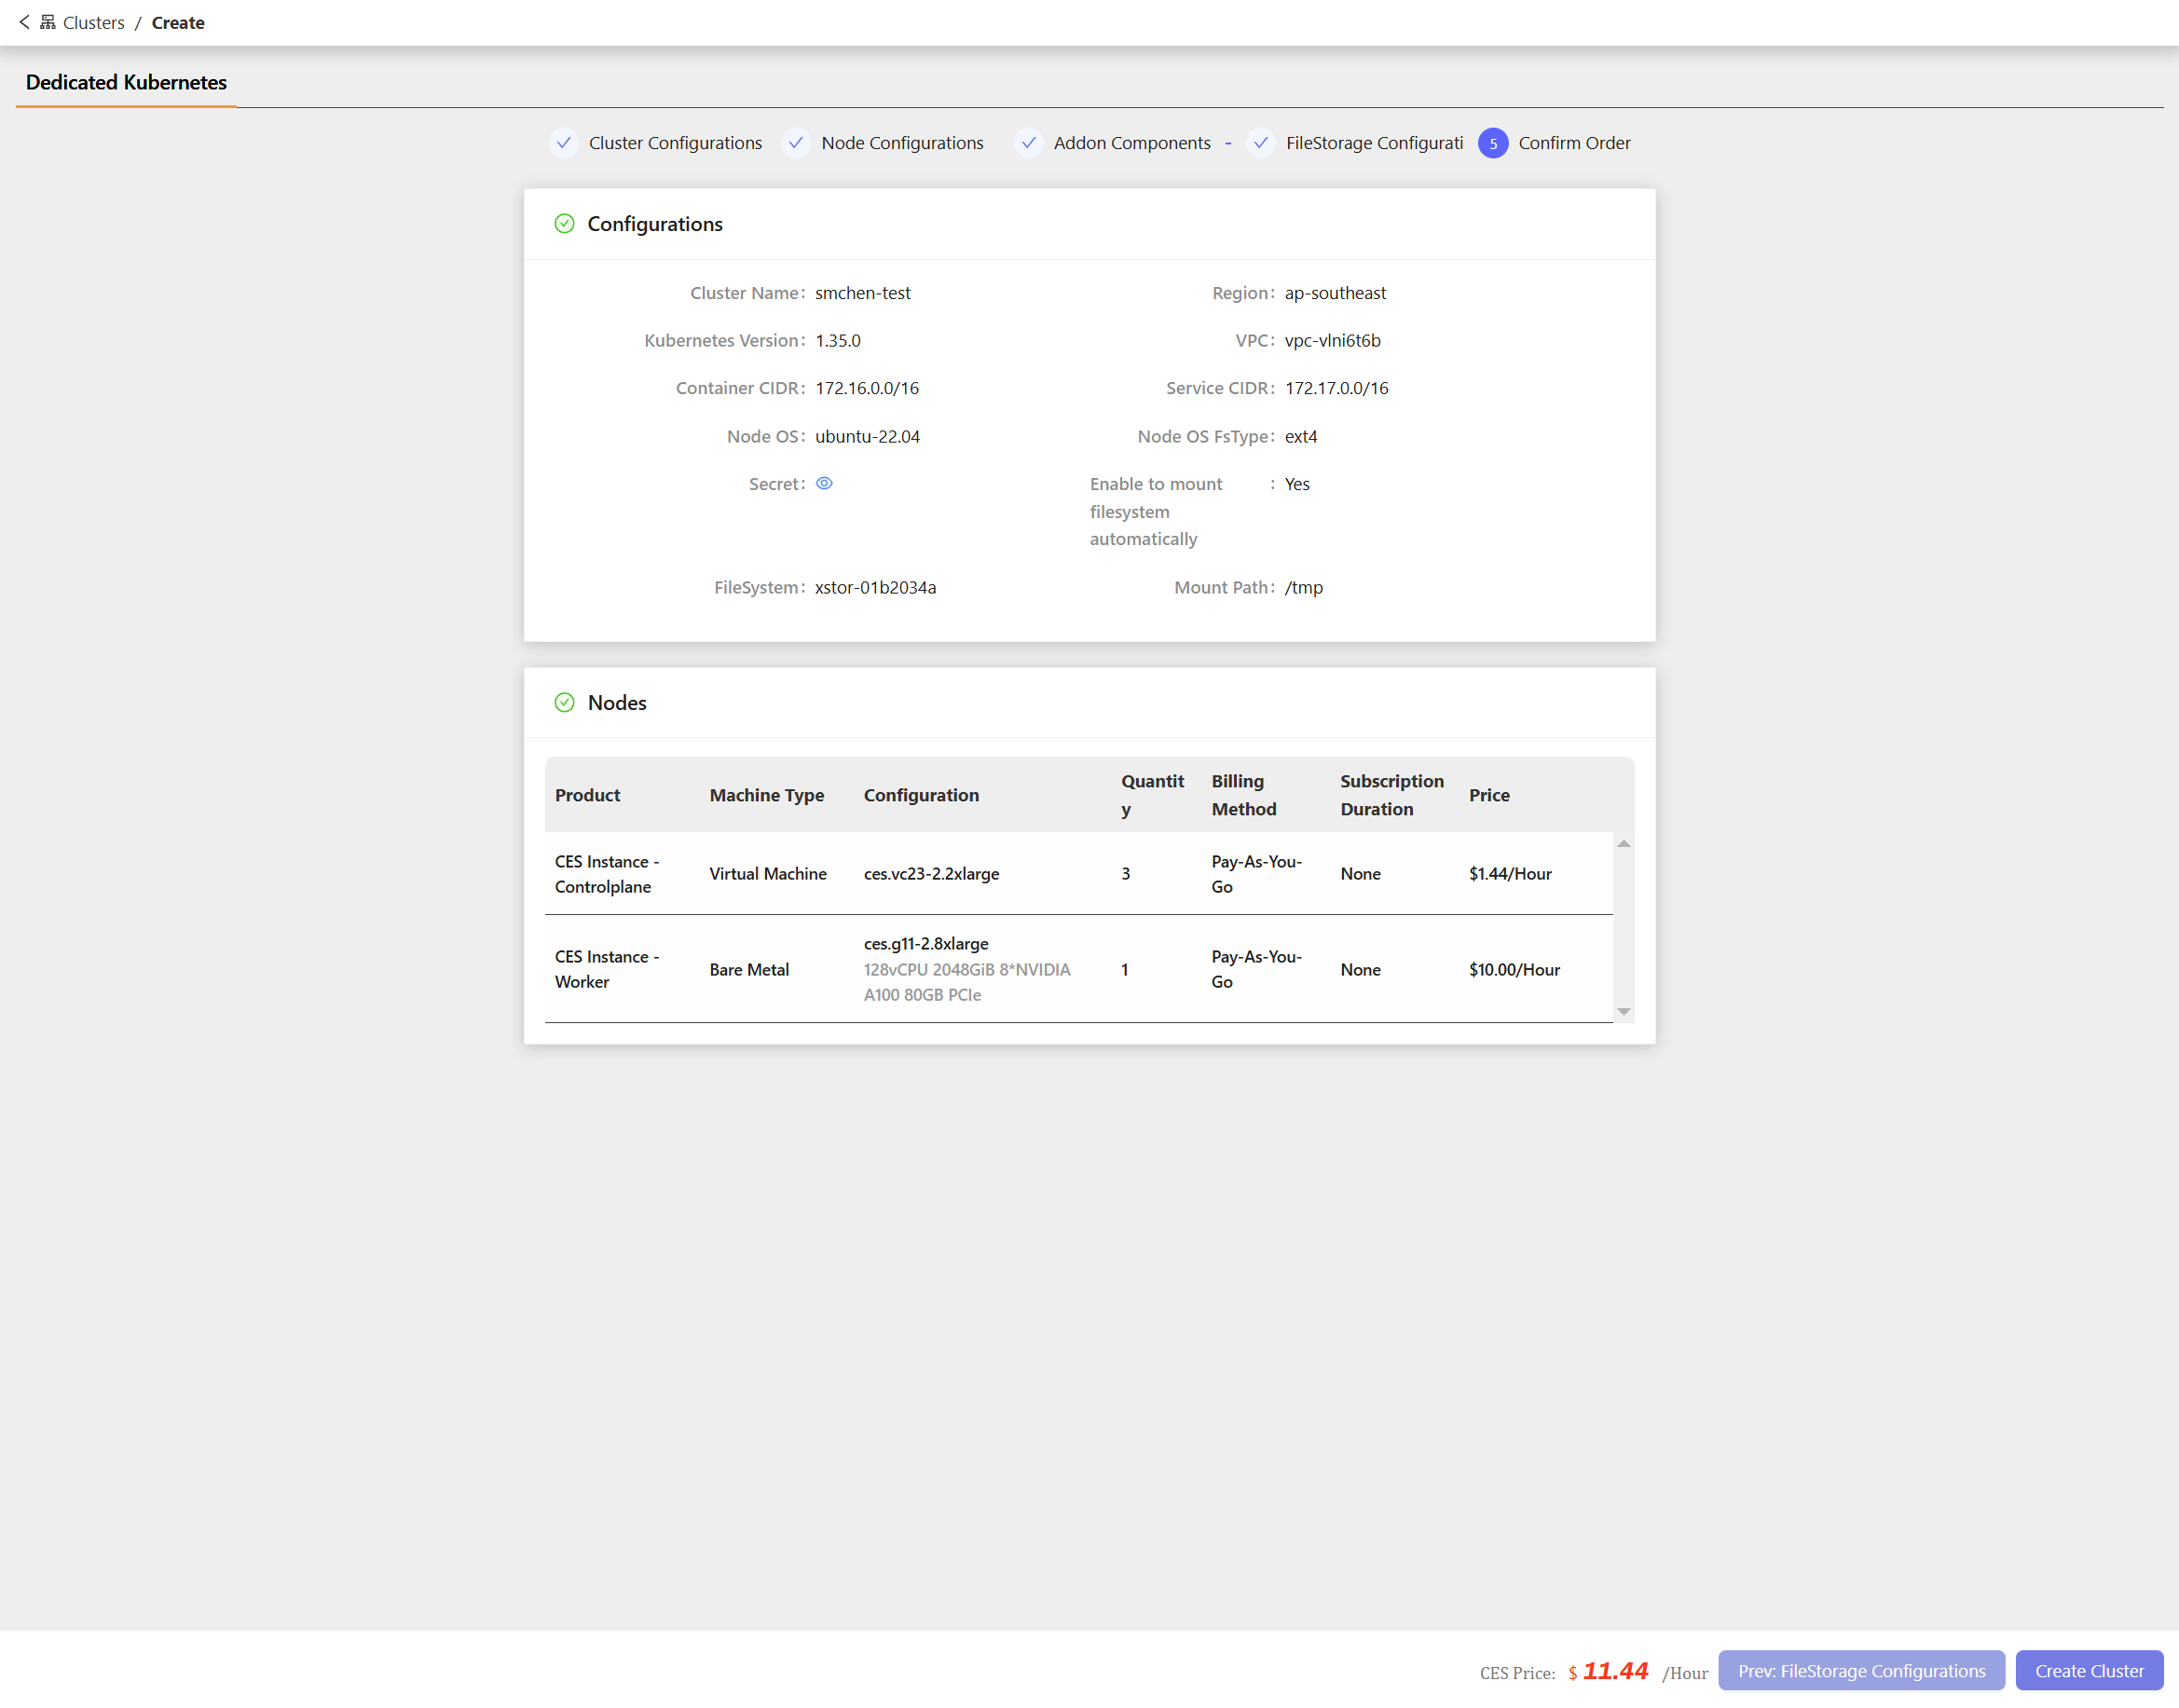
Step 5: Confirm Order
Review all configured settings before submitting. The confirmation page displays two sections: Configurations — Summary of cluster settings, including:
Nodes — Summary of node pricing, including:
Procedure
- Navigate to the Container Service > Kubernetes (CKS) management console.
-
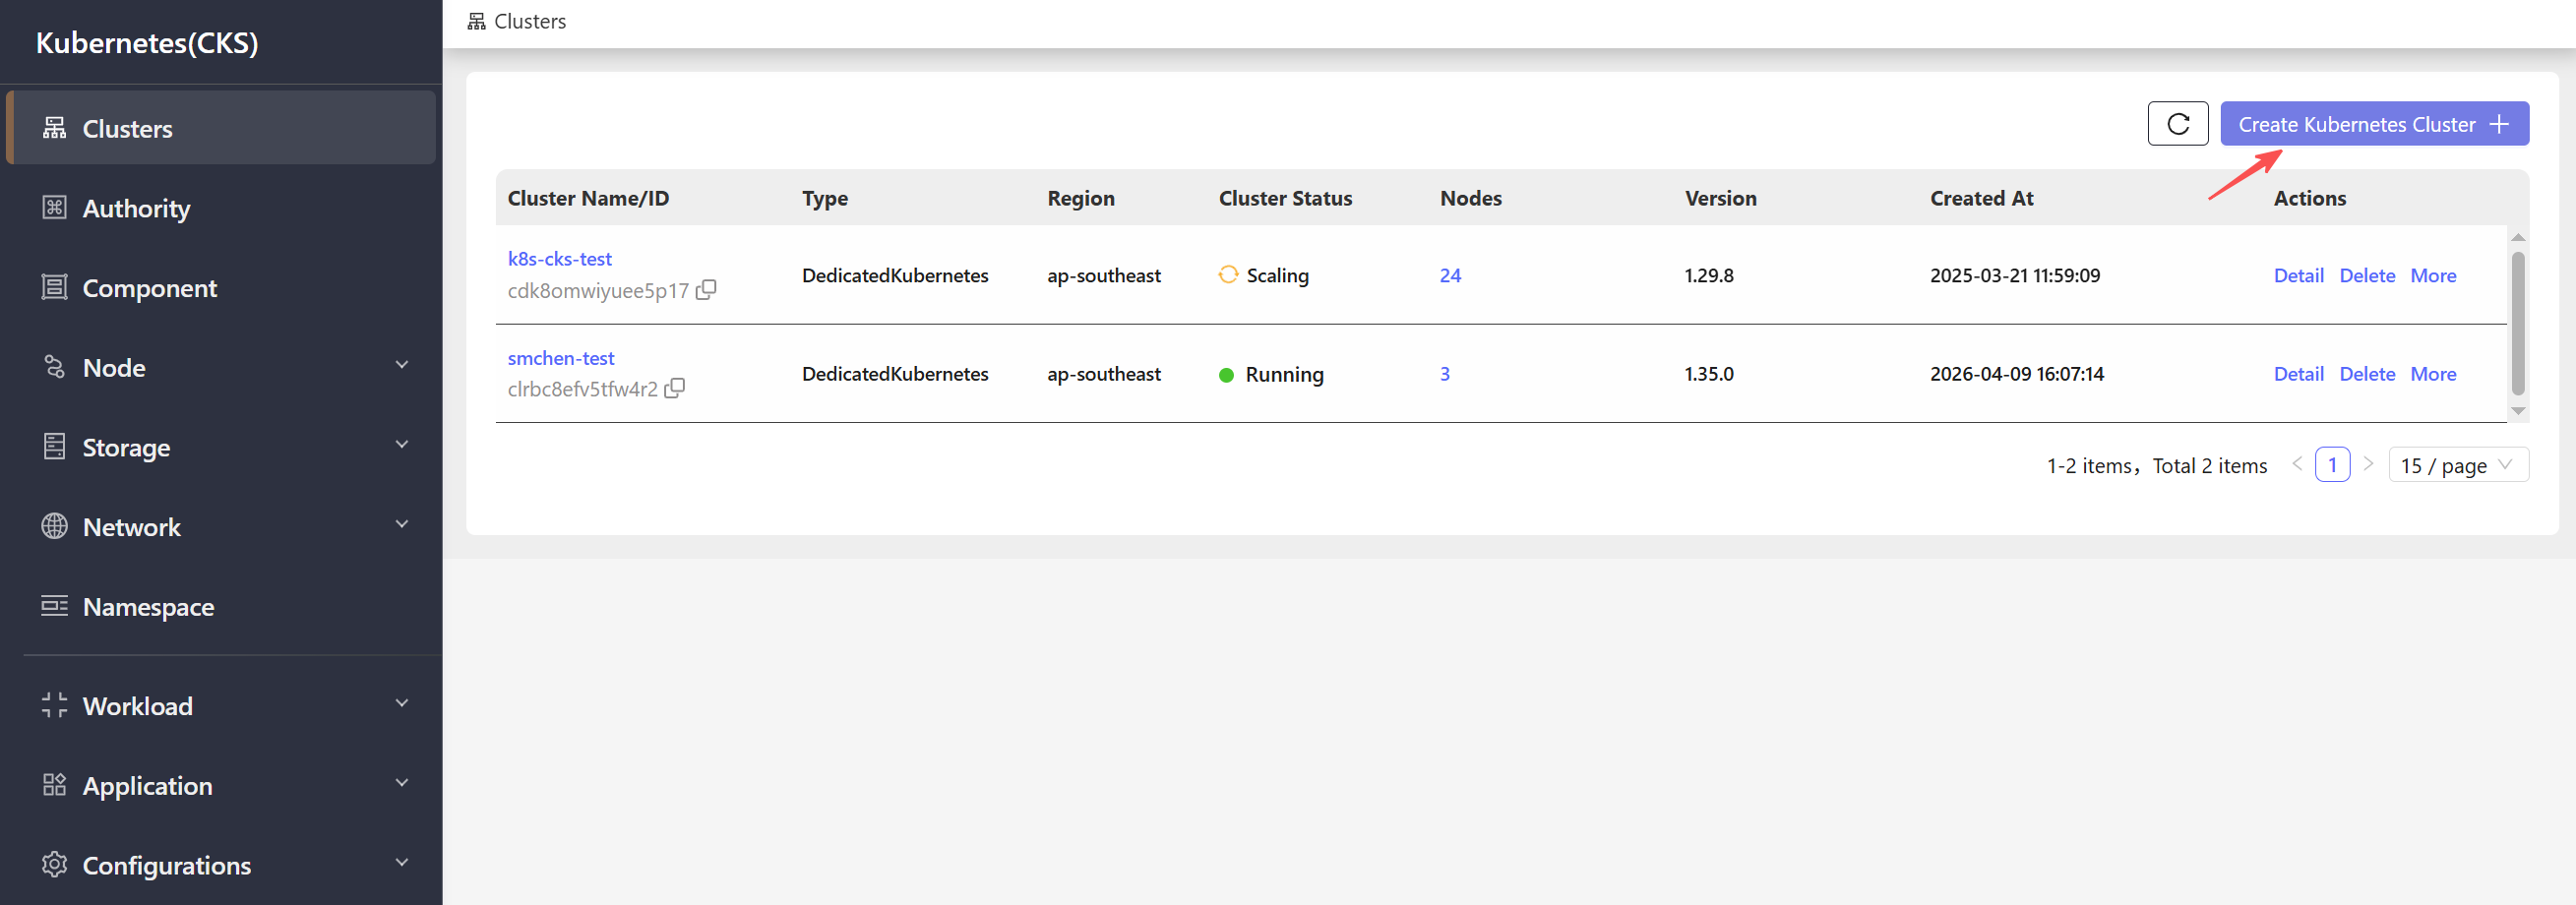
On the cluster list page, click Create Kubernetes Cluster in the upper right corner.
-
Step 1 – Cluster Configurations: Configure the cluster name, region, Kubernetes version, network settings, and node OS. Then click Next: Node Configurations.
-
Step 2 – Node Configurations: Configure the control plane and worker node pool settings, including instance types, node quantity, and GPU driver options. Then click Next: Addon Components.
-
Step 3 – Addon Components: Select the optional add-on components to install on the cluster (e.g., monitoring, GPU plugins, workflow engines). Then click Next: FileStorage Configuration.
-
Step 4 – FileStorage Configuration: Optionally enable automatic filesystem mounting and configure the filesystem and mount path. Then click Next: Confirm Order.
-
Step 5 – Confirm Order: Review the cluster configuration summary and node pricing details. Once confirmed, click Create Cluster.
Expected result
Cluster provisioning typically takes several minutes. Monitor the cluster list for status updates. Creation is complete when the cluster status changes toRunning.